
Drywall is a common material used in many homes and buildings. It is durable and can withstand a lot of wear and tear, but it is not immune to water damage. Water damage can occur from leaks, floods, or even high humidity levels. When drywall is exposed to water, it can weaken and become damaged. Repairing drywall water damage is crucial to maintaining the structural integrity of your home or building. at our water damage restoration Plano company, we are here to make sure it’s done properly
Understanding Drywall Water Damage Drywall water damage can come in many forms, from discoloration and stains to warping and crumbling. Identifying the extent of the damage is the first step in repairing it. Depending on the severity of the damage, you may need to replace the entire section of drywall or just patch it up. It is important to note that if the water damage is caused by contaminated water, such as sewage or floodwater, it is best to call a professional for cleanup.
Materials and Tools Needed To repair drywall water damage, you will need a few materials and tools. These include a utility knife, drywall saw, sandpaper, joint compound, drywall tape, and a putty knife. You may also need a fan or dehumidifier to dry out the affected area before beginning the repair process. It is important to have all the necessary materials and tools on hand before starting the repair.
Table of Contents
Key Takeaways
- Drywall water damage can weaken and damage the structural integrity of your home or building.
- Identifying the extent of the damage is crucial in determining the repair method.
- Proper materials and tools are necessary for repairing drywall water damage.
Understanding Drywall Water Damage
When water enters the drywall, it can cause a lot of damage. Water can seep into cracks and crevices, causing all sorts of problems. Understanding drywall water damage is crucial to repairing it effectively.
One of the most common signs of water damage in drywall is discoloration and stains. Areas that are wet will look darker compared to the rest of the wall. Irregularly shaped spots that are yellow or brown in appearance are water stains, which are usually the result of a slow water leak.
Water damage walls can also cause the drywall to become soft, spongy, and weak. This can lead to the drywall crumbling or falling apart, which can be dangerous. Wet drywall may also start to grow mold, which can cause health problems.
It is important to find the source of the water damage wall and fix it before repairing the drywall. If the water source is not fixed, the drywall will continue to be damaged, no matter how many times it is repaired.
Moisture is the primary cause of water damage walls. Water can enter the walls from a variety of sources, including leaky pipes, roof leaks, and flooding. Once the moisture enters the walls, it can cause the drywall to become saturated, leading to water damage.
In summary, understanding drywall water damage is essential to repairing it effectively. Water damage walls can be caused by a variety of sources, and it is important to find and fix the source of the water before repairing the drywall. Signs of water damage walls include discoloration, stains, and soft, spongy drywall.
you can also contact our company if you need more assistance.
Identifying the Extent of Damage
Before repairing water-damaged drywall, it is essential to identify the extent of the damage. Water damage can cause a variety of problems, including structural damage, mold growth, and compromised insulation.
The first thing to do is to locate the source of the water leak and fix it. Once the source of the water damage has been fixed, you can then assess the damage to the drywall.
If the drywall is only slightly damp, it may be possible to dry it out using a dehumidifier and a fan. However, if the drywall is wet or has been wet for an extended period, it will likely need to be replaced.
One way to determine the extent of the damage is to check the drywall’s texture and color. Peeling, cracking, and bulging are signs of intense leaks and typically necessitate drywall removal and replacement. Minor cracks may not require removal but only require mesh tape and compound for repair.
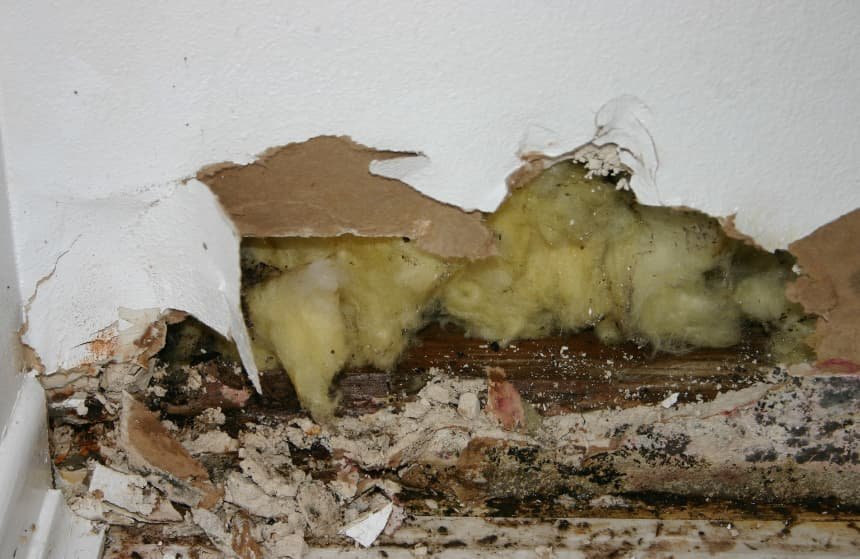
It is also important to check for any damage to the insulation behind the drywall. Wet insulation can lead to mold growth and should be replaced if damaged.
In cases where the ceiling has water damage, it is important to check the drywall ceiling for any signs of damage. Water damage to the ceiling can lead to sagging or even collapse, and it is crucial to address any damage as soon as possible.
Overall, identifying the extent of water damage to drywall is a crucial step in repairing it. It is important to take the necessary steps to fix any underlying problems and replace damaged drywall to prevent further damage and ensure a safe and healthy living environment.
Materials and Tools Needed
Repairing water-damaged drywall requires specific materials and tools to ensure a successful repair. Here is a list of the necessary items to have on hand:
Materials
- Sheetrock repair or drywall repair kit
- Drywall screws
- Drywall mud
- Drywall tape
- Drywall clips
Tools
- Utility knife
- Compound
- Drill
- Sanding sponge or sandpaper
- T-square
When purchasing a sheetrock repair or drywall repair kit, ensure that it contains all the necessary components, such as the joint compound, sandpaper, and putty knife. Drywall screws are needed to secure the drywall to the studs, while drywall mud is used to fill in gaps and seams. Drywall tape and clips are used to reinforce the seams and provide additional support.
A utility knife is necessary to cut the drywall to size, and a T-square can help ensure that the cuts are straight and accurate. A drill is used to secure the drywall to the studs, while a sanding sponge or sandpaper is used to smooth out any rough spots or imperfections. The compound is used to cover the screws and seams, and it can also be used to create texture on the repaired areas.
Overall, having the right materials and tools on hand is essential for repairing water-damaged drywall. With the proper equipment, anyone can successfully repair drywall and restore their walls to their original condition.
Preparation for Drywall Repair
Before starting the drywall repair process, it is important to prepare the area properly. This will ensure that the repair work is effective and long-lasting. Here are some steps to follow:
Step 1: Identify the Source of the Water Damage
The first step in preparing for drywall repair is to identify the source of the water damage. This is important because if the source of the water damage is not fixed, the repair work will be ineffective. It is recommended to hire a drywall service or contractor to identify the source of the water damage and fix it properly.
Step 2: Protect the Surrounding Area
Once the source of the water damage has been identified and fixed, it is important to protect the surrounding area. This can be done by covering the floors and furniture with plastic sheets or drop cloths. This will prevent any damage to the surrounding area during the repair process.
Step 3: Remove the Damaged Drywall
The next step is to remove the damaged drywall. This can be done by cutting out the damaged area with a drywall saw or utility knife. It is important to cut out the damaged area in a straight line to make it easier to patch.
Step 4: Clean the Area
After removing the damaged drywall, it is important to clean the area thoroughly. This can be done by using a damp cloth to wipe down the area and remove any dust or debris. It is important to let the area dry completely before proceeding with the repair work.
Step 5: Patch the Drywall
The final step is to patch the drywall. This can be done by applying drywall compound to the damaged area and smoothing it out with a putty knife. It is important to let the drywall compound dry completely before sanding it down and applying a second coat if necessary.
Overall, preparing for drywall repair is an important step in ensuring that the repair work is effective and long-lasting. It is recommended to hire a drywall service or contractor for best results.
Step-by-Step Guide to Repairing Drywall Water Damage
When it comes to repairing drywall water damage, it’s important to have a step-by-step plan in place to ensure that the job is done correctly and efficiently. Here is a guide to help you through the process:
- Identify the Source of the Water Damage: Before beginning any repairs, it’s important to identify the source of the water damage and fix it to prevent further damage. This may require the help of a professional plumber or contractor.
- Remove Damaged Drywall: Once the source of the water damage has been fixed, remove any damaged drywall. Cut out the damaged area using a utility knife or drywall saw, making sure to cut along the edges of the studs or joists.
- Dry the Area: After removing the damaged drywall, dry the area thoroughly using fans and dehumidifiers. Make sure the area is completely dry before proceeding with repairs.
- Replace the Drywall: Cut a new piece of drywall to fit the hole and attach it to the studs or joists using drywall screws. Make sure the new piece is flush with the surrounding drywall.
- Tape and Mud the Seams: Apply drywall tape to the seams between the new and existing drywall. Then, apply joint compound (mud) over the tape and surrounding area using a putty knife. Smooth out the mud and let it dry.
- Sand and Repeat: Once the mud is dry, sand it down until it’s flush with the surrounding drywall. Apply a second coat of mud and let it dry. Sand again until smooth.
- Paint and Finish: Finally, paint the repaired area to match the surrounding drywall. Allow the paint to dry completely before finishing with a coat of primer and a final coat of paint.
By following these steps, you can repair water damaged drywall and restore your walls to their original condition. Remember to take your time and make sure each step is done correctly to ensure a successful repair.
Preventing Future Water Damage
After repairing drywall water damage, it’s important to take steps to prevent future occurrences. Here are some tips to help prevent water damage:
- Regularly inspect the roof for leaks. If any leaks are found, repair them immediately.
- Ensure that all water sources (e.g. faucets, pipes, appliances) are in good condition and not leaking. If any leaks are found, repair them immediately.
- Install a sump pump in the basement or crawl space if the area is prone to flooding.
- Install gutters and downspouts to direct rainwater away from the house.
- Ensure that the ground around the house slopes away from the foundation to prevent water from pooling around the house.
- Install a water alarm in areas prone to water damage (e.g. basement, laundry room) to alert you in case of a leak or flood.
By following these tips, homeowners can reduce the risk of future water damage to their drywall.
Restoration After Repair
Once the water-damaged drywall has been repaired or replaced, the restoration process can begin. This process involves bringing the area back to its pre-damage state, which includes painting, installation of new drywall, and other necessary repairs.
If the water damage was extensive, it may be necessary to perform additional repairs, such as repairing the ceiling or replacing insulation. It is important to ensure that all repairs are completed before beginning the restoration process.
The cost of restoration can vary depending on the extent of the damage and the repairs required. It is recommended to obtain multiple quotes from reputable companies to ensure a fair price.
In some cases, it may be necessary to hire a professional restoration company to handle the restoration process. These companies specialize in water damage restoration and have the necessary equipment and expertise to complete the job efficiently and effectively.
Overall, the restoration process is crucial to ensuring that the area is safe and habitable once again. It is important to take the necessary steps to restore the area to its pre-damage state to avoid any further issues in the future.
Frequently Asked Questions
How can I fix water damage on a painted wall?
If the water damage is minor, you can fix it by sanding the affected area and repainting it. However, if the damage is extensive, you may need to remove and replace the damaged drywall before repainting.
What are the signs of water damage in walls?
Signs of water damage in walls include discoloration, stains, peeling paint or wallpaper, and a musty odor. You may also notice bulging or cracking in the wall surface.
How do I repair water damaged wall plaster?
To repair water damaged wall plaster, you will need to remove any loose or damaged plaster and then apply a new layer of plaster over the affected area. Once the plaster has dried, you can sand it smooth and paint it to match the surrounding wall.
Is it necessary to replace drywall if it gets wet?
If the drywall is only slightly damp, you may be able to dry it out and salvage it. However, if the drywall has been soaked through or has visible signs of damage, such as bulging or cracking, it will need to be replaced.
How much drywall needs to be removed after water damage?
The amount of drywall that needs to be removed after water damage will depend on the extent of the damage. If the damage is limited to a small area, you may only need to remove a few square feet of drywall. However, if the damage is extensive, you may need to remove entire walls or ceilings.
Can water damaged drywall be saved?
If the drywall has only been slightly dampened and has no visible signs of damage, you may be able to save it by drying it out thoroughly. However, if the drywall has been soaked through or has visible signs of damage, it will need to be replaced.